Wednesday, March 31, 2010

It's Time for You to Go!

Do you ever look around your house and narrow in on something and think to yourself (or even say out loud) "it's time for you to go"?

If you're anything like me, you'll occasionally furnish your home with things that are good enough for now, but that you may not want to stick with forever. Sometimes these items are on sale, or the deal to be had at a thrift store, HomeGoods, or a yard sale was so killer that you HAD to have it. Sometimes it's a gift. Sometimes it's a relic that you bought for your first house and you even forgot you had it.

I recently took a walk through my house to determine what I was going to edit, repurpose, or donate to the charity or the library and I realized that I was totally on autopilot in one room...the bathroom. I honest to goodness think it's because I'm so exhausted until I jump into the shower that I don't even see anything...and it's also because I don't have my contacts in either. Ha!

But that doesn't mean my bathroom (in all it's TEENY glory) should be ignored!  If I don't care for the decals I purchased a couple of years ago, I don't have to live with them anymore...that was the whole point of decals in the first place!

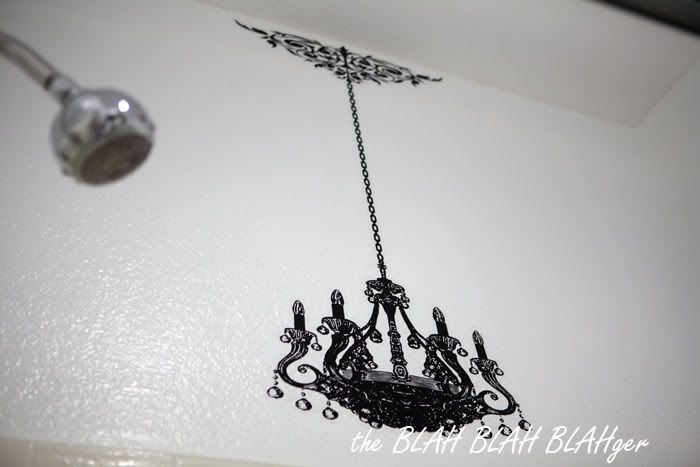
It's time for me to get rid of things that were okay once, but aren't really singing to me now...like the decals!

What do you look at in your house and scratch your head about? Tell me I'm not the only one who impulse buys and then forgets about the item!!!  When was the last time you uttered/thought:
It's time for you to GO!


Monday, March 29, 2010

Craft Room or Craft STUDIO???

***FOR THOSE WHO ASKED, THE PAINT COLOR IS STAR CITY BY DUNN EDWARDS!***

A dear friend of mine, a fellow singleton who is embracing life and all it has to offer, has recently done some remodeling in her home.

I'd been hearing about the project from the beginning and even went over to see it during the process. Jennifer (yes, another one) is very crafty. She's a graphic designer, event planner, brand manager, embroiderer, jewelry maker, etc. Her house is beautifully decorated, but she always had a random supply room at the back of her garage that went un-utilized...until recently.

Rather than use her guest room for her hobbies and crafts, Jennifer decided to renovate the supply room and turn it into her studio. I saw it this weekend and it was SO AMAZING that I had to share it with all of you. It's truly an amazing achievement and something we should all be jealous of! And, in true budget savvy form, all the furniture, with the exception of the lucite chairs is from IKEA!


Congratulations, Jennifer, on such an amazing finished product! I can't wait to come to one of your crafting parties!!!


Tuesday, March 23, 2010

Tool Talk Tuesday: the Dremel

For me, the best part of attending BlissDom was meeting so many wonderful women! Though I arrived late, I ran into longtime internet friends, but also got to meet new ones! Jess, from Frugal with a Flourish was new to me, but it didn't take me long to see what a sweet and talented girl she is...so I HAD to have her visit me in the blogosphere (and she's welcome to come and visit CA anytime, too, hint hint). I LOVE this post on her new Dremel tool and I hope you do, too! ENJOY!


----------


First, I am super excited to my posting here at JJ’s place. Today I would like to introduce you to a new friend of mine – the Dremel! Now, I decided that I wanted one last year and asked for it for Christmas. I haven’t really had a chance to play with it until recently since we now have our garage. This post is all about what I have learned about the Dremel.


First, there are tons of projects you can do with a Dremel! It’s kinda like the iPhone of tools. You want to do something – there is an accessory for that!

Here is an idea of some of the projects you can do with a Dremel
    - Engrave a candle
    - Fix a chair spindle
    - Cut Wire Closet Shelving to size
    - Restore Painted Metal
    - Clean a Grill
    - Sharpen Lawnmower Blades
    - Distressing Jeans (Ha!  Bet you weren't expecting that one!)
There are more ideas for DIY and Home Décor projects on Dremel’s site here.

However, with that many options it can be a little overwhelming to figure out what you want to do and how you want to do it! I have a couple tips if you are new to a Dremel tool as I was.

First, get some “play materials” and go to town. I got some MDF and a pine board and went to town. You really need to practice the amount of pressure and speeds with the different bits.  I won't show you those "practice" pieces, but I will say that you have to get used to the kick back on drill bits and routing pieces!

Next, spend some time on their site learning about the different bits accessories and figure out what you need to do the kind of “work” you want to do with your Dremel. For example – I want to do some light wood working projects with mine so I need to pick up the plunge router attachment. The Hubby wants to use it for some metal work projects on his car – so he has been checking out the polishing and cutting tools. And if you aren’t sure what you need at all – simply use their Accessory Fast Finder to put in your tool type and what you want to do with what kind of material.


Finally, just jump in and try something. For example – I had this frame that I got for $5 at Hobby Lobby (love the clearance sales). I had a project planned for it – hop over to my place to see. But it was a little dinged up.


No worries – I simply pulled out the Dremel and popped on a sanding drum. Sure I could have done it by hand, but this bad boy let me target specific spots and got it done lickety split!  A nice coat of black glossy paint and this baby is ready for her spot in my next project!


I hope this has been a helpful introduction to the Dremel tool and that you are inspired instead of overwhelmed by the options! I think it is a great handy addition to any DIY’er toolbox.

(Please note that this is just my opinion on the Dremel and the things you can do with it. I am utilizing a lot of the links on Dremel’s site because they are good representations of the projects and types of tools and accessories you need. However, no one is paying me for this!)


----------


Thanks Jess, for visiting today and for sharing your fun experiences with the Dremel. And thanks for making me want to run out and get one IMMEDIATELY. Ha!!!


Monday, March 22, 2010

I Heart Faces: Angles


I attended a wildly fun couples baby shower yesterday...yes, I realize that seems unusual, but it's true. Probably because the guests of honor are wildly fun, as are their friends!

However, this post isn't so much about the couple, but rather the angle. This week's i Heart Faces challenge is all about angles, and while I typically enjoy shooting "down" on clients, this time I knew their attitude, attire, and the venue called for something more unique. I placed them at the top of a staircase and shot "up" instead, and I LOVE the result. I'm definitely going to be keeping this image in my gallery because I just LOVE it! To see more, images from their shoot, please check out my photoblog!

And to see more amazing images, please check out i Heart Faces!
I'm also sharing this image at My 3 Boybarians for Sweet Shot Day. Head over there for some awesome images, too!


Sweet Shot Day


Virtual Vino: Stemless Wine Glasses

Sooooo, you know those super cute stemless wine glasses that everyone is carrying these days?

I'm here to tell you that they don't really work well for all wine...in spite of their cuteness.

Here's why:

Red wine tastes best when it has time to breath and open up. Using a stemless wine glass is great because the heat from your hands causes a natural chemical reaction in the wine to open up all the flavors. If you're going to use stemless for your reds, make sure they have a wider opening, because this, too, allows for oxidization with releases even more flavor!

However, the same is not true for white wines and sparkling wines. The beauty of white wines and sparkling wines (IMHO) is their crispness. The cold enhances and encapsulates the flavor. Many people enjoy white wines on a hot day because they are so refreshing and delicious...but as they begin to warm up or go room temperature, the flavor is not enhanced like a red wine, but rather flattens a bit. So why would you do that intentionally by drinking out of a stemless glass and allowing your body heat to ruin the flavor?

Be merry!


Saturday, March 20, 2010

Two of My Favorite Things in One Place

I LOVE ice skating and THIS SONG, so man was I stoked to stumble upon this on tv last night!!! Hope you enjoy it, too!


Wednesday, March 17, 2010

Repurpose Decor in Unusual Ways

I recently had some friends over for dinner and ever since I got my new dining room furniture, I've been undecided on how to enhance it.

In my previous dining room, I had two candles in the middle of the table, but I've been wanting to change things up without spending any moolah.

I frequently like to buy myself flowers for the house and this weekend was no different. But rather than just cleaning them up and placing them in a vase on the table, I decided to look and see what I had around the house to change up the decor...and I found it!

I don't know if you remember my post about my new green kitchen, but in it, I shared an image of the top of my refrigerator where I had a collection of crystal jars, bottles, and vessels. I decided to grab a few, trim the flowers and voila, I had a new way to display and arrange my flowers.

Just because I'd never used them to display flowers, didn't mean that I shouldn't or couldn't. So, I encourage you to look around your house and think about ways YOU can repurpose decor for different uses. Just because it may be unusual, doesn't mean it's wrong!


How have you repurposed decor in new and unusual ways???


Tuesday, March 16, 2010

Sweet Shot Day: Las Vegas Desert Shoot

Last week, I was in Las Vegas for WPPI, the largest photography conference and trade show in the world...I think. It was an AMAZING experience. I learned SO SO SO much and had a great time.

I also got to do a few shoots and this is one of my very favorites. I'll be posting more images over on my photoblog, but in the meantime, I wanted to share this one here! I hope ya like it because I was in freezing cold wind for hours in order to get this shot! : )


Sweet Shot Day


I'm also sharing this at Angry Julie's Wordless Wednesday. Head over there and check out some other gorgeous pics!

PS - Hi Katie, if you're reading this!!!


Monday, March 15, 2010

No Boil Noodle Lasagna

I love lasagna, but the process of making it never seems fun. That was until I found the perfect no boil noodles from Barilla! If you haven't used these before, I'm telling you they will change you life! This review was not sponsored in any way...it's just my PSA to the world, so you can trust me on this!!!

I've also made the recipe a little healthier. Lasagna is super easy to edit into a lower cal meal. By adding spices and vegetables, you'd never know that it was missing any of the delicious fat!

Start by browning a pound of beef. Feel free to use turkey, too. I used ground beef this time because my market has started carrying a 4% fat package! During the browning process, I add onions and garlic. I find that it makes the beef much more flavorful!

Just before it is done, I add in some red peppers. I don't want them to lose too much flavor, so they only go over the heat for a bit.

In a separate bowl, mix 2 egg whites, a 16 oz carton of non-fat cottage cheese, and 4 cups of low fat parmesan cheese.

Here is the pièce de résistance! The noodles come out of the box just like this and you don't have to do a darn thing to them!

Layer a cup of sauce (I like an italian sausage and pepper sauce for THAT much more flavor), then place four noodles down upon it, then layer a 1/3 of the cheese mixture, half of the beef, and a cup of skim mozzarella cheese. Do another layer of sauce, noodles, cheese mixture, then another of sauce, noodles, beef, cheese and cheese mixture. Then do you final noodles, sauce and cheese.

Once it's ready to go like this, wrap it in foil and bake it for 40-50 minutes at 375!

Then, when it's done, serve it to your guests and DOMINATE that bad boy. It doesn't taste low fat, but it does taste DANG GOOD!
This recipe is SUPER simple, really yummy, and it also tastes good for left overs! If you've never used the no boil noodles, I urge you to try them. It makes the prep time for a tasty lasagna only 15 minutes. I'm telling you, these noodles are from Jesus and you MUST try them.

I'm sharing this recipe with my friends at Tasty Tuesday today. Please stop over and see what else is cookin!


Friday, March 12, 2010

80s Dance Party

If you follow me on twitter, you saw that I posted this yesterday...and you know what? I just can't get enough of it. There is something about the beat, the outfits, and those RIGHTEOUS dance moves... I know I have a bizarro sense of humor, but I can't help it. This truly brings joy to my heart! The other thing that just cracks me up is seeing the comments below the video on the main page...the first of which is "SEXY!!!!SEXY!!!WOW". I can't promise it's "SEXY!!!!SEXY!!!WOW", but I can promise that it will bring a smile to your face!


Wednesday, March 10, 2010

Decorating with Plants

I've recently been considering adding some flora up in the hizzie. When I'm entertaining, I like to purchase a small  grouping of flowers (usually white), and arrange them on a silver tray on my ottoman in the living room. If I'm hosting a shower or open house, I'll sometimes get a larger bouquet and place them on my breakfast bar.  I've been given a few potted plants (small bulbs, etc) as gifts, and I tried to have some potted plants live on the deck.  But all in all, I have a problem.

I HAVE A BLACK THUMB.

For my most recent birthday, my parents surprised me and bought me a wine barrel. It's amazing and I've always thought it would look fantastic as a planter. As we're starting to see the clouds roll away and everything is turning green again, I've begun to consider actually making this planter happen.

Simultaneously, I've been considered having some more greenery in the house.  We have fresh plants all around the office and they're so cheerful.  So, why don't I replicate that cheeriness here at home?  Knowing me, if I bought silk plants, the suckers would get dusty and gnarly pretty quickly, so fresh plants are probably my best option.  PLUS, they say elegance and quality to me.

SO, as I'm getting close to moving forward on bringing some greenery back into the home, I need your help. How many of you DO have fresh plants? How often do you water them? Do your floors get yucky underneath? What are the secrets to good flora?

I'm looking to YOU, dear readers, for the best tips for decorating with fresh plants!!!


Tuesday, March 09, 2010

CONDO2CASTLE: Use Your Storage Spaces Wisely

I have a confession to make...I can be a TOTAL slob.

It's true. Ever since I was a little girl, I have hated cleaning. As an adult, I have really fought with my sloppy nature and have lived more responsibly, putting things away and hanging things up...but I'm not going to lie, there are times when I do look in my closets and cabinets and shudder.

On the positive side of things, knowing my own limits, I now have a housekeeper who comes twice a month and makes sure that I'm not living in filth, HOWEVER, she doesn't do any organizing... that still falls on my shoulders. And living in a small condo, I've learned that organizing storage spaces is CRITICAL to feeling like there is a lot of it.

Under Bed Storage
If you don't have one of these, you can still replicate it. (Thanks Apartment Therapy for the image.)
Using under bed storage is a no-brainer. For those of you who live in cold areas, I encourage you to tuck all your BIG winter clothes away in the spring and summer.  There are a number of great and inexpensive products for under bed storage.  You can find bags/drawers/boxes with wheels at Ikea or even Target.

Hall Closet
You hall closet or coat closet can be another way to greet your guests. In many small homes (such as mine), it has to be multi-functional. That doesn't mean that it should be a catchall, though. Sure, you may need to store cleaning supplies, winter clothes, extra dishes, tools, etc, but by using shelving, storage baskets, organizational tools, it will not appear to be overcrowded or messy.  When guests come over, this closet can be used to take their purses or jackets.  If you have a place for them, and some extra hangers (I prefer wooden ones), it will show that no details have gone unnoticed in your home.  It shows you went to the extra effort to make your home hospitable.

This great green closet my friend Angry Julie's. Too learn more about it, go here. The thing I love is that 1) she used color 2) it's functional for storage, and for hanging guests coats 3) it doesn't have anything on the floors. It feels clean, open, and that there is plenty of space!

Kitchen Cabinets
Have you seen these before? They are cheap and incredibly helpful for those of us with teeny kitchens. Really, a must have! Organize World carry a boat load of similar options for less than $10. For those of us who don't have a pantry and really have to maximize space, creative vertical storage is crucial.

I'm also a huge fan of using drawer space creatively. For instance, dish drawers are becoming really popular. I know people with kids who love them because they're children can help put clean dishes away or set the table. Look how cool this is!

And don't even get me started about how much I LOVE pull out spice cabinets! They are functional, efficient, and totally fun!  They also make the statement that no detail in your home has been overlooked. And what a way to improve the value of your home by showing that you went to the extra effort to make your work space extra special!

Bathroom Cabinets
I have one bathroom in my home, which means that my bathroom is also for guests...unless I'm feeling REALLY mean. It can be a challenge keeping necessities, cleaning supplies, etc, together in a way that it organized and classy. There are a number of options that provide organization at low costs. This is a fun undercabinet organizer that I recently stumbled across:

Medicine cabinets and free standing cabinets can also be your best friend. Always keep guest towels and necessities in an easily accessible location, and always organized. Having things tucked away nice and tight will provide more room for storage and frankly, you won't look like a slob when visitors go rummaging through your cabinets, like you know they all do! : )


Monday, March 08, 2010

Virtual Vino: the 5 S's of Tasting

I love wine. I love wine tasting. But not because I'm a lush (well, maybe just a little).

There's a social side of wine that I've truly grown to love over the last few years. Being at a vineyard, amongst the grapes, is truly one of my favorite places to be in this whole world. I've never seen anything more beautiful. Sure, the ocean is amazing in all of its glory and power, but if I won the lottery, I'd move to wine country in a heartbeat. Anywhoooooo...

When I'm tasting wine with friends, I truly enjoy talking about flavors and the unique differences we all experience. I love how we can all taste something and say "that would go great with steak/fish/a summer salad/chicken." I also love how we can have a taste of something and say "this would be so and so's favorite." It's just fun!

Last week, I was invited over to a friend's house for an event with a private sommelier. It was a blast. But it was also educational...and today, I'm going to share the things I learned from her, with YOU!

The Five S's of Wine Tasting

See
First, start by looking at the color of your wine. Is it almost clear? Greenish golden? Buttery in color? The tone of the wine will help determine what kind of wine you're about to drink.

Swirl
Swirl your glass around and look at how long it takes for the liquid to run down the glass again. If it's thick and kind of drips down, it has a different chemical equation and taste than if it's thinner. This is also known as the "legs."

Sniff
After you've swirled your glass, the oxygen has opened up the notes and "bouquet" of the wine, so take a deep sniff. Stick your nose right on into the glass and determine the flavors you smell. Berries? Mellon? Grass? Pepper? Nothing is wrong and your sniffer will give your taster a heads up next.

Sip
Take a small sip, and determine if the notes you smelled are the ones you taste. Make an initial assessment.

Savor
Now, take a larger sip and roll the wine around your tongue. Make sure all your taste buds interact with the wine. Sometimes, the flavor will be stronger on the tip of your tongue, sometimes on the back; sometimes the acidity will react with the underside of your tongue, too. This is truly where you will determine if you like the wine and want to have a full glass. (A taste is usually just one to two ounces; a full glass of wine is 4 ounces.)

I hope you've enjoyed this first installment of Virtual Vino! I know that some people have challenges with alcohol, and I hope this doesn't offend anyone. I'm not talking about abusing it here, but enjoying it with friends!!!

Special thanks to my wine club girls (and Amy's dad, who was our special guest star). What started as a small group from church, ended in a wine club. Yes, Jesus turned water into wine, and we've taken his example and learned to enjoy it and fellowship with each other!!!


Sunday, March 07, 2010

Off to My First Photography Conference

I attend conferences all the time for work. I do public affairs for a large developer and began my career in politics, therefore I can talk to just about anyone. Celebs don't freak me out and I always like to find things I have in common with folks...just to have a real conversation, instead of forced fake stuff.

Well, I head out today for WPPI, the Wedding and Portrait Photographers International conference. I'm SO STOKED and excited to be going. I'm taking workshops on boudoir photography, night photography, and I'm going on a shoot out in the desert. I couldn't be more excited. I'm also excited to go to seminars and learn from the greats. This is seriously a trip to Vegas that I'm thrilled about...and I'm not even a gambler!

I can't wait to share and implement the things I learn. In the meantime, please head over to my photoblog to check out the maternity shoot I did for my best friend last week!


Friday, March 05, 2010

PhotoFANatic Friday: Lens Love

On twitter last week, I saw a number of shooters discussing lenses for their DSLR cameras and asking about what they "needed" next. I've been considering a new series to discuss all the crazy things I've learned over the last couple of years and thought to myself, "why not now?"

So ya, I do have a photo business, but it wasn't all that long ago that I was just a chick with a cool camera. I now how an even cooler camera that I was able to buy from business revenue (woot!), but the things I learned on my smaller camera are still the basics that I consider today.

So, if you're a mom, a blogger, or just a regular ole joe with a DSLR and don't have any plans to go pro, I applaud you! You are pushing your creative juices and rocking some good equipment! And here is where I tell you the truth that many won't say:

YOU DO NOT NEED TO SPEND CRAZY AMOUNTS OF MONEY TO LOVE YOUR IMAGES!

You do NOT need L line lenses. You do NOT need Photoshop or Lightroom. If you're on a tight budget, relax, and know that you can take quality snaps without dropping big bucks! Photoshop Elements is great. I have a bunch of friends who use Picnik, too, and I've also heard great things about Aurora.

But this post is about lenses, so let's get back to the topic!

Wide Angle Lenses:

First of all, do you know what wide angle means? I didn't at first, and I'm not ashamed to admit it.

Wide angle means the camera is able to take in more of the frame from one side to the other. The frame is literally WIDE. It also means that your subjects aren't going to be super up close.

This kind of lens is GREAT for landscape or other important scenery. I like to blog about recipes and goofy things I do in the kitchen or other DIY projects around the house. Having a wide angle lens on my camera ensures that I can get a broader scene in the shot.

This is where things get goofy. Wide means a smaller millimeter on the lens. So, 55mm is wider than 200mm.

Not All Lenses are Created Equal:

THE OTHER IMPORTANT THING TO KNOW ABOUT LENS SHOPPING is that not all lenses are created equal. Yes, many are a great option and great for the budget, but they might not last forever.

Let's take my favorite lens as an example.

I'm a Canon and my first lens was the 50mm 1.8. It was DELICIOUS. It was fast (meaning that it let in more light and had a bigger aperture - i.e. lower number) and affordable - about 80 bones. It was also light weight and plastic.

Then I upgraded to the 50mm 1.4 and I dropped that old boyfriend like a bad habit. The 1.4 is even faster, is made of metal and is sturdier, and cost about $350-ish. It's sharper and more precise, has a fast focusing ability, and is my go-to lens in portrait sessions. THEN, there's the BITCHIN 50mm 1.2. I don't own this bad boy, yet, but someday, yes someday, I will make him mine and we will ride off into the sunset together. But at over a thousand bucks, that someday isn't here, yet.

All this goes to say that if you want good buttery bokeh (subject in focus and background blurred out), you want something in a higher aperture than a F/4. Most consumer lenses start at either F/3.5 or F/4. If you want to get a higher aperture (lower F stop #), find a good and affordable lens like the 50mm 1.8. It's not going to break the bank and will kick your consumer lens' arse in the bokeh category, if you're shooting on Av priority or manual! : )

EF-S vs. EF and DX vs. FX:

Next up, in the affordable everyday awesome lens category, I want to talk to you about EF lenses versus EF-S (Canon) and DX versus FX (Nikon) lenses. Please put me on pause, then run out and check your lenses. You can see what you have on the front of the lens before the mm designation.

Some time ago, when camera manufacturers went digital, they thought it would be good to make lenses for small sensor digital cameras. Usually the cost doesn't change, however, a EF-S or DX isn't made to fit on advanced camera bodies, which have full sensors. SO, let's say that someday you decide to go pro and upgrade your camera body to a pro-level camera, you won't be able to use the EF-S or DX. SO, if you have the opportunity, only buy EF or FX lenses!

So, if you're ready to take the plunge and start shopping for new lenses or other camera equipment, I highly encourage you to go with a reputable company. Going online and buying the "cheapest" isn't always the smartest. Sometimes that price comes with poor customer service. The company that I frequently use has great prices AND customer service. And they even purchase used equipment. Click on the link below to learn more about Adorama and their great prices and selection.


So, that's all for today. I've probably blah blah blah'd WAY too much about this topic, but I'm eager to share with you all the interesting things I've learned to date. I have a business, but I don't claim to know it all. I'm just sharing...AND if you have any further questions, PLEASE feel free to contact me at any time at jj@theblahblahblahger.com. And I hope to continue this series, unless of course nobody comments and you all tell me I'm a doofus. If that's the case, I'll bury my head in the sand and go back to talking about my house. : )


Wednesday, March 03, 2010

Where Do You Sit?

So, the new table and chairs are in full effect. But I've got a problem...

I DON'T KNOW WHERE TO SIT.

As said before (too many times to count), I'm single. My former table, now sitting in the garage waiting for my sister to come and get her, was a large square and I loved it. I always sat wherever I wanted, usually that was closest to the kitchen. I typically had that side of the table to myself. However, now I've got a true head and foot. My inclination would be to sit at the head, but it's not as close to the kitchen. Is that a problem?

Where do you sit when you've got people over? Tell me what you think I should do!
I'm leaning toward the head (which in this photo is against the mirrored wall over there on the right).


Tuesday, March 02, 2010

Tool Talk Tuesday: The Mysterious, But Ever Helpful, Allen Wrench

If you've ever had to put together a piece of furniture, you've likely encountered today's featured tool...the allen wrench.
An allen wrench is a special "L" shaped six-sided wrench, coming in various sizes, that fits into a recessed hexagonal socket hole in the end of an allen bolt. These guys come in very handy when you have a tight space that you need to get to OR when you need to use a lot of force and pressure.

The first time I saw them in my toolbox, I was confused about how often I'd really use them. But, being an avid DIYer, I have owned many random pieces of furniture that have come in a kit and required me to put them together. And let's face it, just about every early piece of furniture I owned came from IKEA, where they LOVE to send you home with a heavy box and lots of little pieces. I don't know who decided to create the allen wrench or bolt, probably just some guy that we'll call "Allen", but you can bet that he made his goldmine off of these crazy instruments.

Owning your own set of allen wrenches is always a good idea, too, because many times, when using a lot of force, an allen wrench can get stripped. Most of the DIY kits come with one, but I always like to have a back up. And mine came in handy this week when I received my new étagère for the living room. LOTS of allen bolts and one pitiful allen wrench. But you know what, I got the job down all by myself...with the help of Allen!


Monday, March 01, 2010

Kitchen Confidential: Delicious Pork Rub

I'm a huge fan of pork. It's delicious, nutritious, and lean. Last weekend, when I made the baked chicken, I purchased a ton of fresh herbs, so I scoured the interwebs trying to find another healthy dish utilizing them. And I found a killer pork rub recipe.

Pork chops are a standard at my house, but I haven't made many tenderloins. That will change now, because this dish was so fantastic that I ate all of the leftovers throughout the week. DELISH, my friends, I tell you, delish!!!

As always, my first step in the kitchen was to open a yummy bottle of South Coast Winery's Chardonnay Sans Chene.  It was mellow, buttery, and strong.  It makes me happy and if my dinner guest was a drinker, that bottle would have been dunzo immediately.  But, I threw the vacuum seal on it and it happily lasted me through the week.  South Coast is a So Cal vineyard that produces really great wines.  As I'm allergic to tannin, I have become a connoisseur of whites, and this vineyard consistently produces great ones!  I highly recommend you check them out!
But next up, the REAL ingredients: 2 lbs of pork tenderloin, 1 tsp black pepper, oregano, sea salt, garlic salt, and 2 tsps of fresh thyme.  You'll also need 2 tsps of EVOO.

Coat your baking dish with non-stick spray, then cover the tenderloin with the EVOO. In a separate dish, mix the dry ingredients together to make the rub.
Then, take the rub and work it into the tenderloin. You'll want to make sure you've got the dry ingredients on the top and bottom.
Bake on 400 degrees for about 40 minutes...but you're really going to want to rely on a thermometer here. Pork is done at about 160 degrees at the center. When you pull it out of the oven looking like this, your guests will oooh and aaah!

It will likely look too pretty to eat, but at this point, I implore you to TEAR into that sucker because it is mouth-wateringly good!!!
It was divine and EASY...and who DOESN'T love the other white meat???